- What is Android?
- Under the Hood: The Android Architecture
- The 4 Building Blocks of an Android App
- Building the User Interface: Views and Layouts
- The App's Rulebook: AndroidManifest.xml
- Your Toolkit: Android Studio & Gradle
- Conclusion
A Beginner's Guide to Android Mobile Application Development
Have you ever had a great idea for a mobile app? With billions of active devices worldwide, Android represents a massive opportunity for developers to build and share their creations. But where do you even begin?
This guide will walk you through the foundational concepts of Android development, from the operating system's core architecture to the essential building blocks of your very first application.
What is Android?
At its core, Android is a mobile operating system developed by Google. It's built on a modified version of the Linux kernel and is famous for its open-source nature (known as the Android Open Source Project, or AOSP). This openness allows manufacturers like Samsung, Google (with its Pixel line), and OnePlus to customize the OS for a wide variety of devices, from smartphones and tablets to watches and TVs.
Why Kotlin? (And What About Java?)
You will hear two languages mentioned for Android development: Java and Kotlin.
- Java: For many years, Java was the primary language for Android. It's robust and has a massive community.
- Kotlin: In 2017, Google announced Kotlin as a first-class, official language for Android. It is modern, safer (helps avoid common errors like null pointer exceptions), and more concise than Java. Today, Kotlin is the strongly preferred language for all new Android development.
This guide will focus on the concepts, which apply to both, but if you're starting new, learn Kotlin.
Under the Hood: The Android Architecture
To build robust apps, it helps to understand what's happening beneath the surface. The Android OS is a "software stack" organized into distinct layers, each with a specific job.

- Applications Layer: This is the top layer where your app lives. It's also where you find all the other apps on the device, like Contacts, Phone, and Email.
- Application Framework: This is the developer's toolbox. It provides the high-level managers that your app calls upon. For example, you use the
NotificationManagerto post a notification, theActivityManagerto manage your app's lifecycle, andContentProvidersto access data from other apps. - Android Runtime (ART) & Native Libraries:
- ART: This is the engine that runs your app. When you build your app, your Kotlin/Java code is compiled into an intermediate format. When installed on a device, ART (Ahead-of-Time) compilation translates this into native machine code, which allows your app to run quickly and efficiently.
- Native Libraries: Not all code is Kotlin/Java. Android relies on core C/C++ libraries for high-performance tasks like drawing 2D/3D graphics (OpenGL/Vulkan), handling database management (SQLite), and processing media.
- Hardware Abstraction Layer (HAL): This brilliant layer is what allows Android to run on so many different devices. The HAL provides a standard interface (e.g., "turn on the camera flash") that the Application Framework can call. The device manufacturer (e.g., Samsung) then writes the specific, low-level driver code to implement that command for their specific hardware.
- The Linux Kernel: The foundation of Android. It manages all the low-level hardware drivers, power management, memory, process management, and core system services.
The 4 Building Blocks of an Android App
Every Android application, no matter how simple or complex, is constructed using a combination of four fundamental components. The Android system manages these components and their lifecycles.
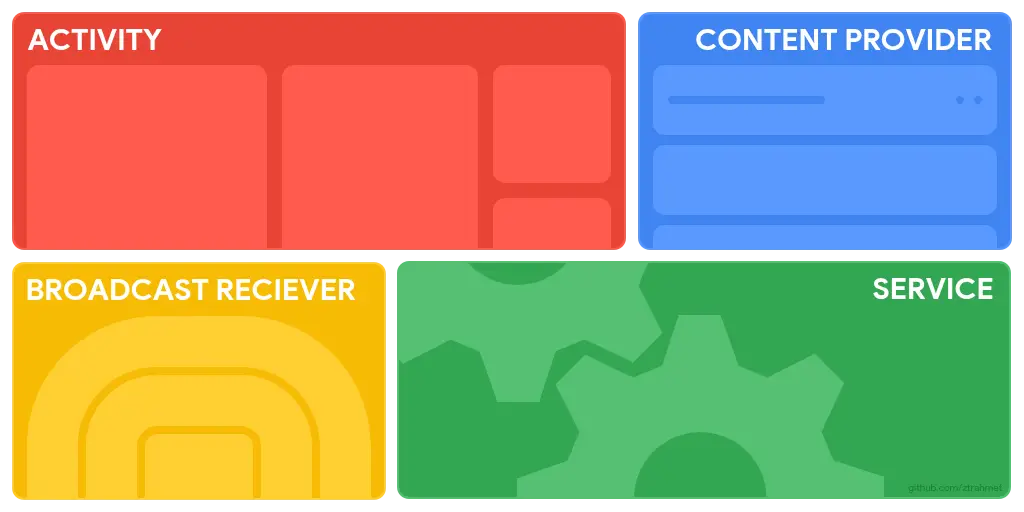
Activities: An
Activityrepresents a single screen with a user interface (UI).- Classic View: A messaging app might have one
Activityfor the conversation list and anotherActivityfor a single chat screen. - Modern View: Many modern apps use a Single-Activity Architecture. They have one main
Activitythat acts as a container forFragments(reusable UI pieces). You navigate between fragments within that single activity, which is a more flexible and efficient approach.
- Classic View: A messaging app might have one
Services: A
Serviceruns in the background to perform long-running tasks without a UI. The classic example is a music app playing a song even after you've left the app. Services are also used for tasks like downloading large files or syncing data with a server when the app isn't open.Broadcast Receivers: This component acts as a listener, waiting for system-wide announcements (broadcasts). It allows your app to react to events even when it's not running, such as the battery getting low, the system booting up, or a new photo being taken. An app might use this to schedule a task after the device has finished booting.
Content Providers: A
Content Provideris the secure way to share data between applications. Your app doesn't (and can't) just reach into another app's private files. Instead, it must ask the system'sContentProviderfor permission. For example, to let a user pick a contact, you use theContactsContractprovider. To let them pick a photo, you use theMediaStoreprovider.
Building the User Interface: Views and Layouts
We just discussed that an Activity represents a single screen with a user interface. But what is that screen made of? The answer is Views and ViewGroups.
A ViewGroup is a special, invisible container whose job is to define the layout, or structure, of your screen by organizing the Views inside it.
This visual hierarchy is what you build:
View: This is the basic building block for all UI components. A
Viewis a (usually) rectangular area on the screen that draws something and responds to user interaction.- Use Cases (Examples):
TextView(displays text),Button(a clickable button),ImageView(displays an image), orEditText(a text entry field).
- Use Cases (Examples):
ViewGroup: This is an invisible container that acts as a layout by organizing other
Views (and even otherViewGroups). It is responsible for positioning its children on the screen.- Use Cases (Layout Examples):
LinearLayout: AViewGroupthat arranges its children in a single horizontal or vertical line. Perfect for a simple form or a toolbar.ConstraintLayout: The modern and most flexibleViewGroup. It lets you position views relative to each other and the parent screen (e.g., "place this button to the right of that image").FrameLayout: AViewGroupthat stacks its children on top of each other, like a deck of cards.
- Use Cases (Layout Examples):
The Classic vs. Modern Way: XML vs. Jetpack Compose
You will encounter two different ways to build these UIs:
Classic (XML Layouts): For years, developers defined their layouts in a separate
XMLfile. This file would create the tree ofViewsandViewGroups. Your Kotlin/Java code would then "inflate" this layout file and find eachView(like theButton) to attach logic to it.Modern (Jetpack Compose): This is the strongly recommended approach for all new Android development. With Compose, you do not use XML. Instead, you describe your UI directly in your Kotlin code using special functions called "Composables." You simply state what the UI should show for a given state, and Compose handles the rest. It's faster to write, more powerful, and avoids many common bugs from the old system.
The App's Rulebook: AndroidManifest.xml
If the components are the building blocks, the AndroidManifest.xml file is the blueprint. This essential file, located at the root of every project, tells the Android system everything it needs to know about your app, including:
- Component Declaration: Which components (activities, services, etc.) exist in your app. Every
Activitymust be declared here. - App Permissions: What permissions your app needs (e.g.,
<uses-permission android:name="android.permission.INTERNET" />). - Hardware Features: What hardware your app requires (e.g.,
<uses-feature android:name="android.hardware.camera.any" />). This helps the Google Play Store filter your app so it's only shown to devices that can actually run it. - Intent Filters: Which
Activityshould launch when the user taps your app's icon on the home screen.
Your Toolkit: Android Studio & Gradle
Finally, to put all this together, you need two key tools.
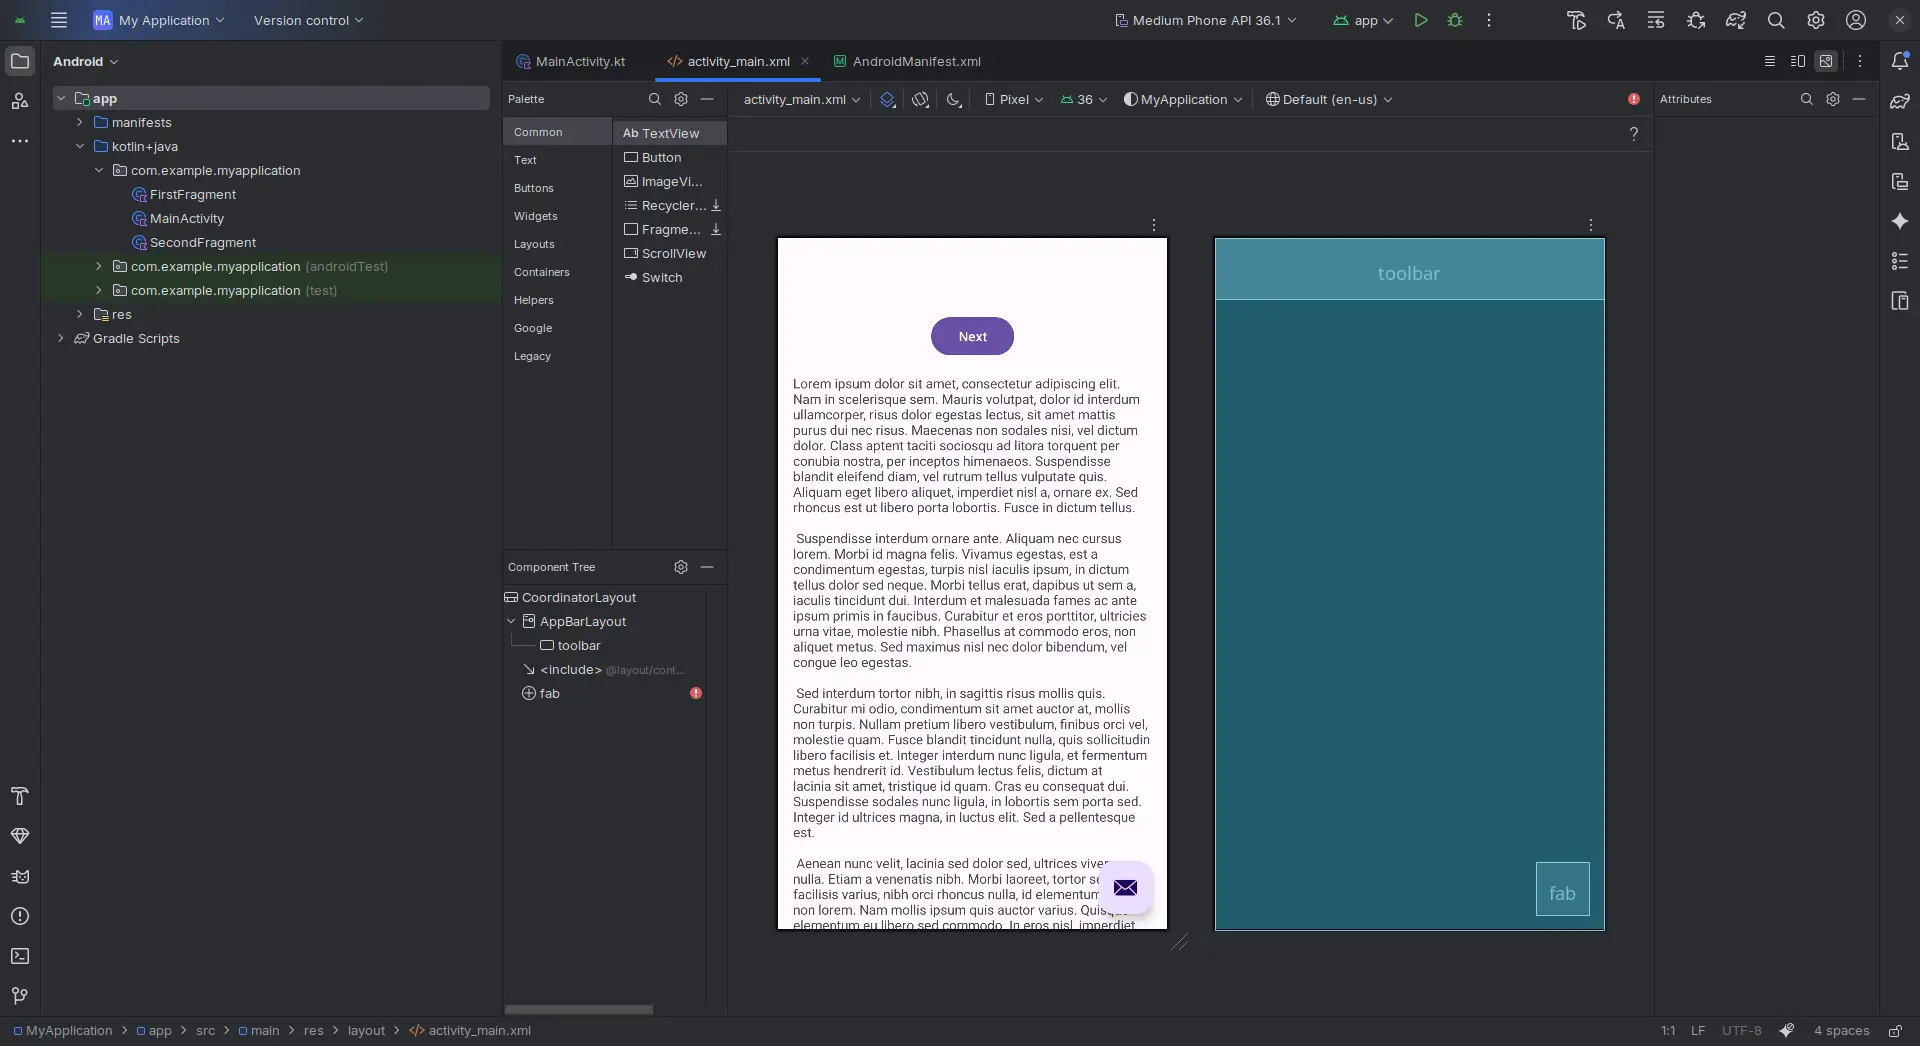
- Android Studio: This is the official Integrated Development Environment (IDE) from Google. It's a powerful and free all-in-one suite that includes an intelligent code editor for Kotlin/Java, a layout designer, a debugger, and a fast device emulator to test your app.
- Gradle: You will also see "Gradle" mentioned everywhere. This is the build system that Android Studio uses. Its job is to take all your code, your resource files (images, layouts), and any third-party libraries you've included, and "build" them into the final
.apkor.aab(Android App Bundle) file that gets installed on a device.
Conclusion
While that's a lot of theory, don't feel overwhelmed. You now have the map and understand the "why" behind how Android works.
The best way to make it all click is to start building. Don't just read about it—do it. Fire up Android Studio, start a new project, and try to build something, even if it's just a simple "Hello, World!" app.